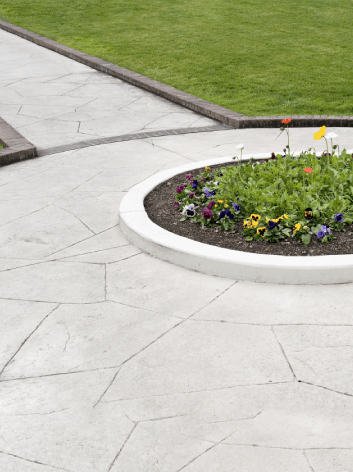
Creating a flawless concrete surface in a home requires more than simply pouring a mixture of cement, water, and aggregate. The process must be carefully coordinated from site evaluation through final finishing to guarantee durability, safety, and aesthetic appeal. Understanding each phase of the residential concrete installation process helps homeowners set realistic expectations, avoid common pitfalls, and appreciate the craftsmanship that goes into a long-lasting floor or patio.
Pre-Installation Planning
Successful concrete work begins long before the first batch of cement is mixed. A thorough planning stage ensures that the project proceeds smoothly and stays within budget.
Site Assessment and Design
- Evaluate soil conditions, drainage patterns, and existing structures.
- Determine the appropriate slab thickness, reinforcement requirements, and expansion joint placement.
- Collaborate with a qualified residential concrete contractor to develop detailed drawings and material specifications.
Permits and Regulations
- Check local building codes for required permits, especially for load-bearing applications.
- Confirm compliance with fire-rating, slip-resistance, and accessibility standards.
- Secure approvals before any excavation begins to prevent costly rework.
Preparation of the Subgrade
The subgrade forms the foundation for the concrete slab. Proper preparation eliminates settlement and cracking risks.
- Clear the area of vegetation, debris, and loose soil.
- Compact the native soil to at least 95″?% of its maximum dry density.
- Install a granular base (typically crushed stone) 4-6″?inches thick, then compact again.
- Lay a vapor barrier or moisture-proofing membrane when moisture control is critical, such as beneath interior floors.
Formwork Installation
Formwork defines the shape, dimensions, and edge finish of the slab. Accurate form placement is essential for a level surface and clean lines.
- Use sturdy lumber or metal forms, braced securely to resist concrete pressure.
- Set forms to the exact elevation specified in the design documents.
- Apply a release agent to the interior of the forms to facilitate removal without damaging the concrete.
Reinforcement and Embedded Elements
Reinforcement distributes loads and controls cracking. The type and placement depend on the slab’s purpose.
- Place steel rebar in a grid pattern, typically #4 (??-inch) bars spaced 12-18″?inches apart.
- Use welded wire mesh for lighter residential applications.
- Install post-tension cables, anchor bolts, or conduit sleeves as required for fixtures, HVAC, or future plumbing.
Mix Design and Placement
The concrete mix must meet strength, workability, and finish requirements. Selecting the right mix is a hallmark of an experienced residential concrete services provider.
- Target a compressive strength of 3,000-4,000″?psi for most residential slabs.
- Incorporate admixtures for water reduction, air entrainment, or rapid setting when needed.
- Deliver the mix promptly to the site to prevent cold joints.
- Use a concrete pump or chute to place the material evenly, avoiding segregation.
Finishing Techniques
Finishing determines the slab’s appearance, slip resistance, and durability. Each step must be timed precisely.
Initial Screeding
- Level the concrete with a straightedge or laser-guided screed.
- Check for uniform thickness and correct any high or low spots.
Floating and Bull Floating
- Use a magnesium or wood float to embed aggregate and smooth the surface.
- A bull float extends the finish farther from the edges, reducing joint lines.
Troweling and Texturing
- Apply a power trowel for a polished, high-gloss finish on indoor floors.
- For outdoor patios, a broom finish or stamped pattern provides slip resistance.
Joint Cutting
- Cut control joints at a depth of ?? the slab thickness while the concrete is still green.
- Space joints at 10-12 times the slab thickness (e.g., a 4-inch slab gets joints every 40-48″?inches).
Curing and Protection
Proper curing maintains moisture and temperature conditions needed for the concrete to achieve its design strength.
- Cover the slab with a curing compound, polyethylene sheeting, or wet burlap for at least 7 days.
- Maintain a temperature range of 50-85″???F during curing; use insulated blankets in colder climates.
- Prevent premature loading; allow a minimum of 24-48″?hours before foot traffic and 7 days before heavy equipment.
Final Inspection and Maintenance
After curing, a comprehensive inspection verifies that the slab meets all performance criteria.
- Check for surface defects, cracks, or unevenness.
- Confirm that expansion and control joints are properly sealed.
- Provide the homeowner with maintenance guidelines, such as periodic sealing for decorative finishes.
Choosing the Right Partner
When selecting a provider for residential concrete installation, consider experience, portfolio quality, and adherence to industry standards. A reputable residential concrete company will follow each step outlined above, ensuring the finished slab performs reliably for years to come.